
Category: Progress
-
Stanchion and Solar progress
We are really excited with the progress on our stanchions and what we have learnt means we have redesigned our aft solar “arch” yet again (I’ve lost count, this might be the 10,000th version). Stanchions and Gates This was our first stanchion base. The carbon fibre tube is 250mm long with an external diameter of…
-
Galley progress
We have made lots of good progress on the galley this weekend. First Jane has painted the insulated hull plus the bulkhead. B&Q kitchen and bathroom paint (Whistler for the main areas and Monaco for the highlights). We then dry fitted the sink worktop. As we did so we redesigned it. Now that we are…
-
Composting and our forecabin layout
In Our Compost Toilet deadline we said we that our current plan is to create a place for composting the septage (the dry solids from our Nature’s Head compost toilet). To achieve the temperatures to rapidly kill all pathogens three things are needed: We need to insulate the space where are composting because our volumes are…
-
Improved insulation for our galley
A couple of weeks ago we wrote Insulating the galley, today we have improved the way we are holding the insulation in place. The vertical battens we tried last time didn’t work well. The bend was too sharp. So now we have 120mm wide strips of 3.6mm plywood with the small battens to prevent the…
-
Parts preparation
Rather than go to the boat last night we have been preparing some parts at home (and working out a bit better what we need at home and what at the boat). First task was ripping a 40mm square batten diagonally in half to create two triangular sections. This is to act as a large…
-
Insulating the galley.
We have started to fit the insulation in the galley.5mm self-adhesive foam with foil backing against the hull and deckhead.Will be covered by 40mm of xps foam board.The hope is that the 5mm stops condensation in any gaps between the xps board (which isn’t very flexible) and the curves of the hull.Depending on location we…
-
Slow Galley progress
We seem to spend a lot of time moving stuff around the boat to get it out of the way for jobs or meals or sleeping. Then lots of time working things out and planning. Plus I had to buy a full sheet of marine plywood and very carefully bring it back to the boat…
-
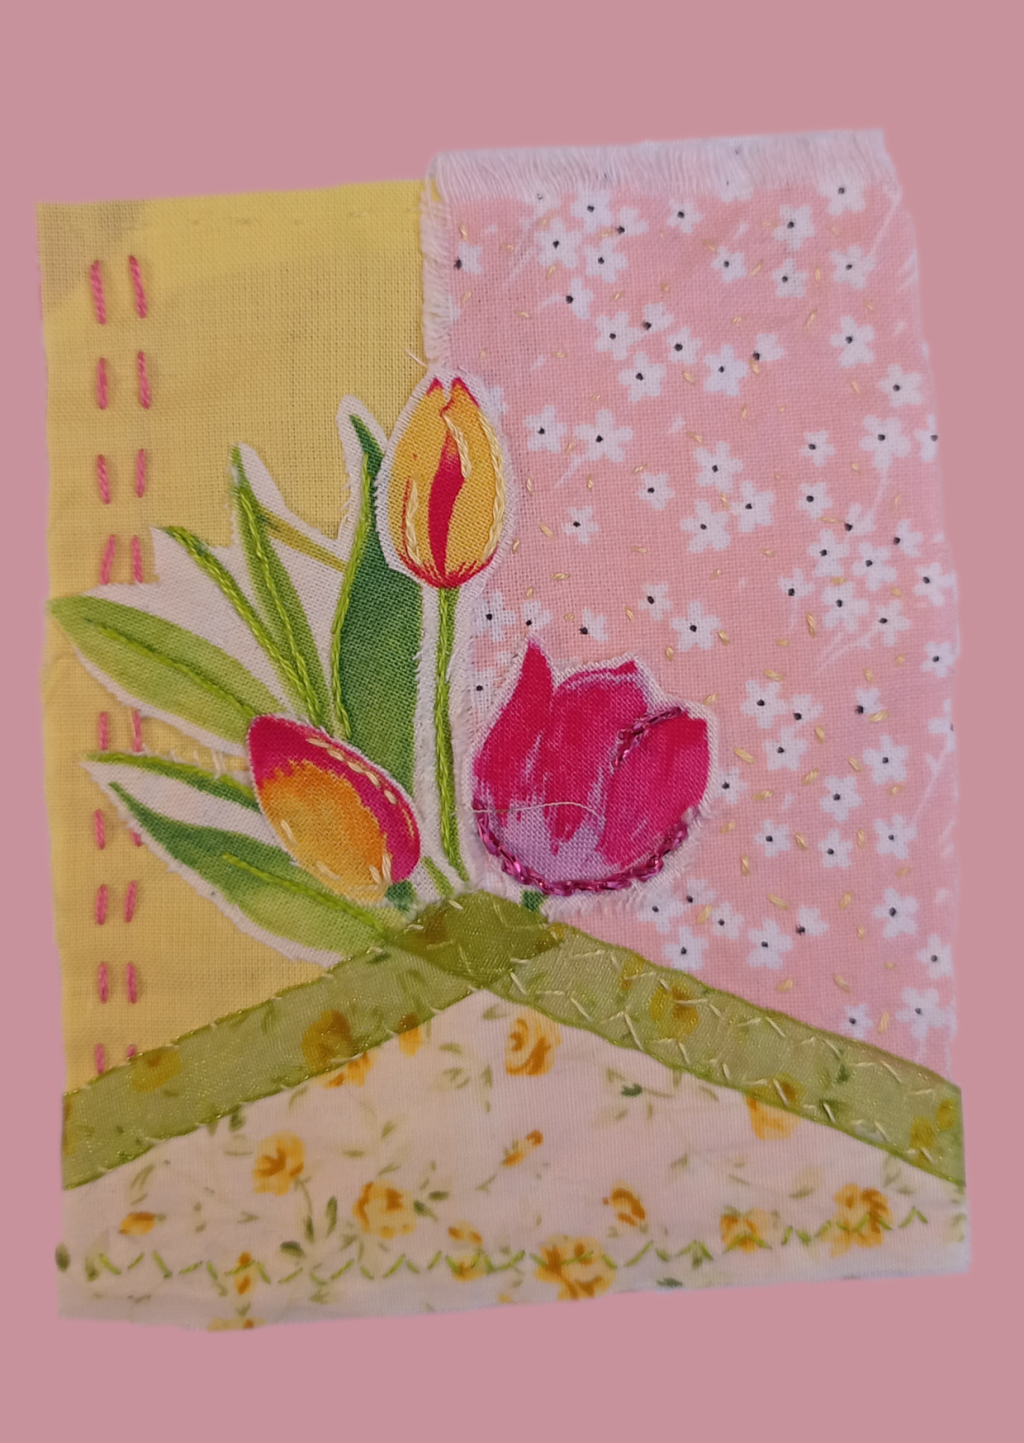
New shop is live!
We have a new shop where Jane is selling her beautifully crafted sewing projects as well note cards featuring her embroidered designs. The shop is at https://ko-f.com/sustainablesailing and is still in the early stages, lots more to come. As an incentive to join our regular supporters all our ko-fi members get a discount in the…
-
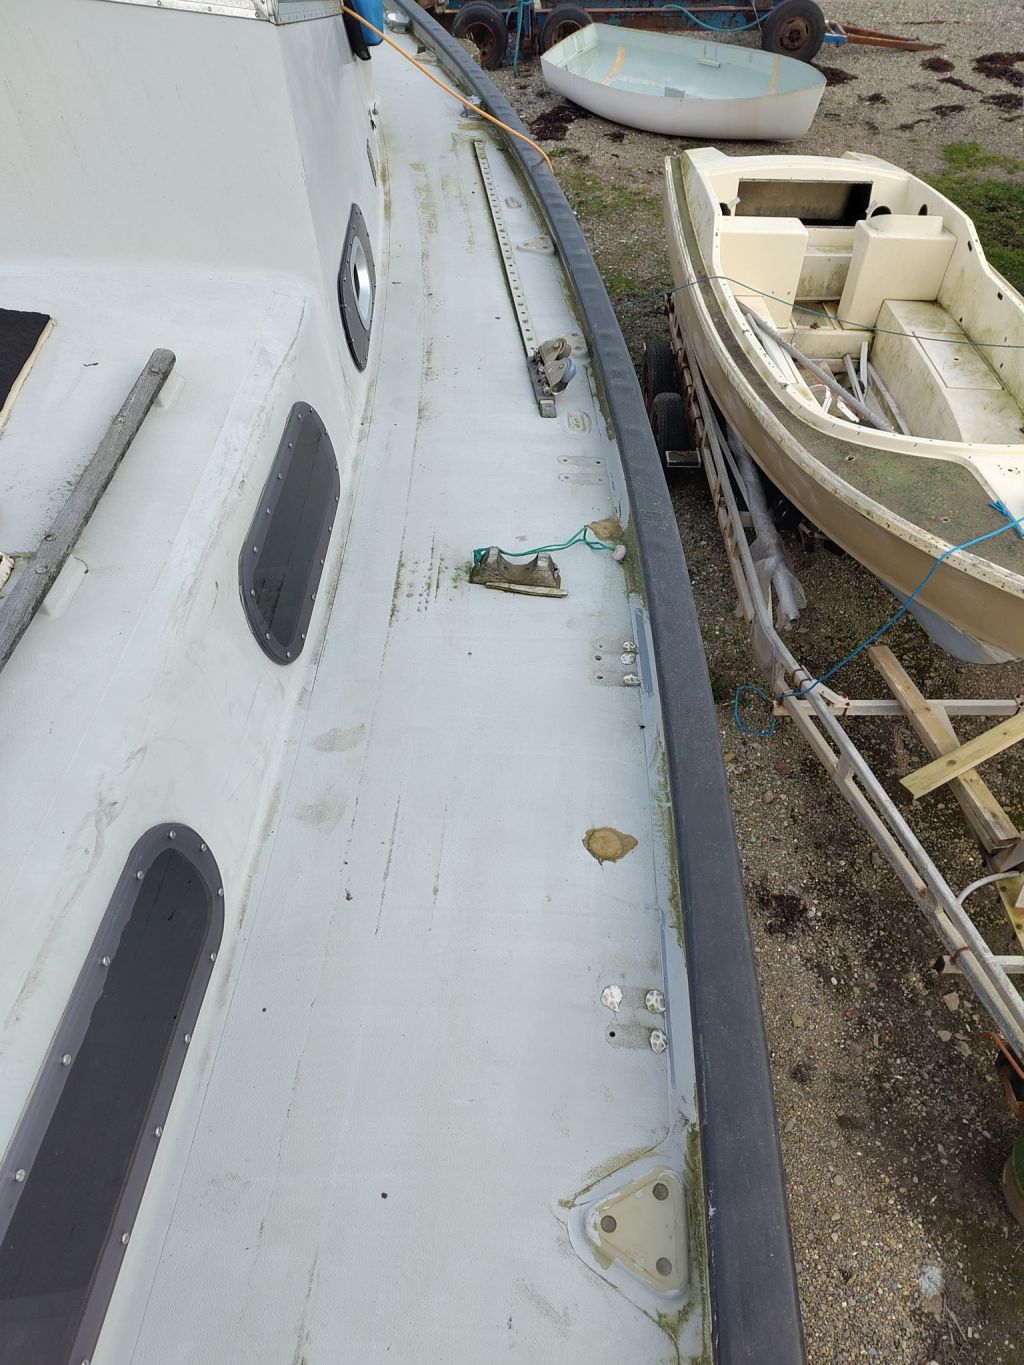
Small leak fix grows into let’s do everything
This weekend we arrived determined to tackle the leaks in the port side deck that we found in the storms around the new year. We have holes from old deck cleats that we removed when fitting the chainplate backing plates. We hadn’t got around to properly filling them. As we started clearing stuff and thought…
